
The basis for a multiframe shot is a combination of multiple shots (taken in rapid sequence) to be layered and aligned in Photoshop.
Thanks again to diver Bryce DiMauro
HOW TO BEGIN:
While shooting your subject, a tripod is recommended (although not strictly necessary, as long as you have a fairly steady grip).
Locking down the tripod, I shot Bryce on high-speed continuous shooting mode, locking the focus and exposure settings- capturing a string of 10 images (8 went into the finished image, above). Shot details are below, although this will vary depending on your shooting conditions and subject:
Nikon D700, 50mm lens at f1.4, shutter speed 1/2000s, ISO 2000
(Side note: The dive selection was left up to the diver, but as it turned out this one especially led to a pleasing pattern and rotation for the finished image.)
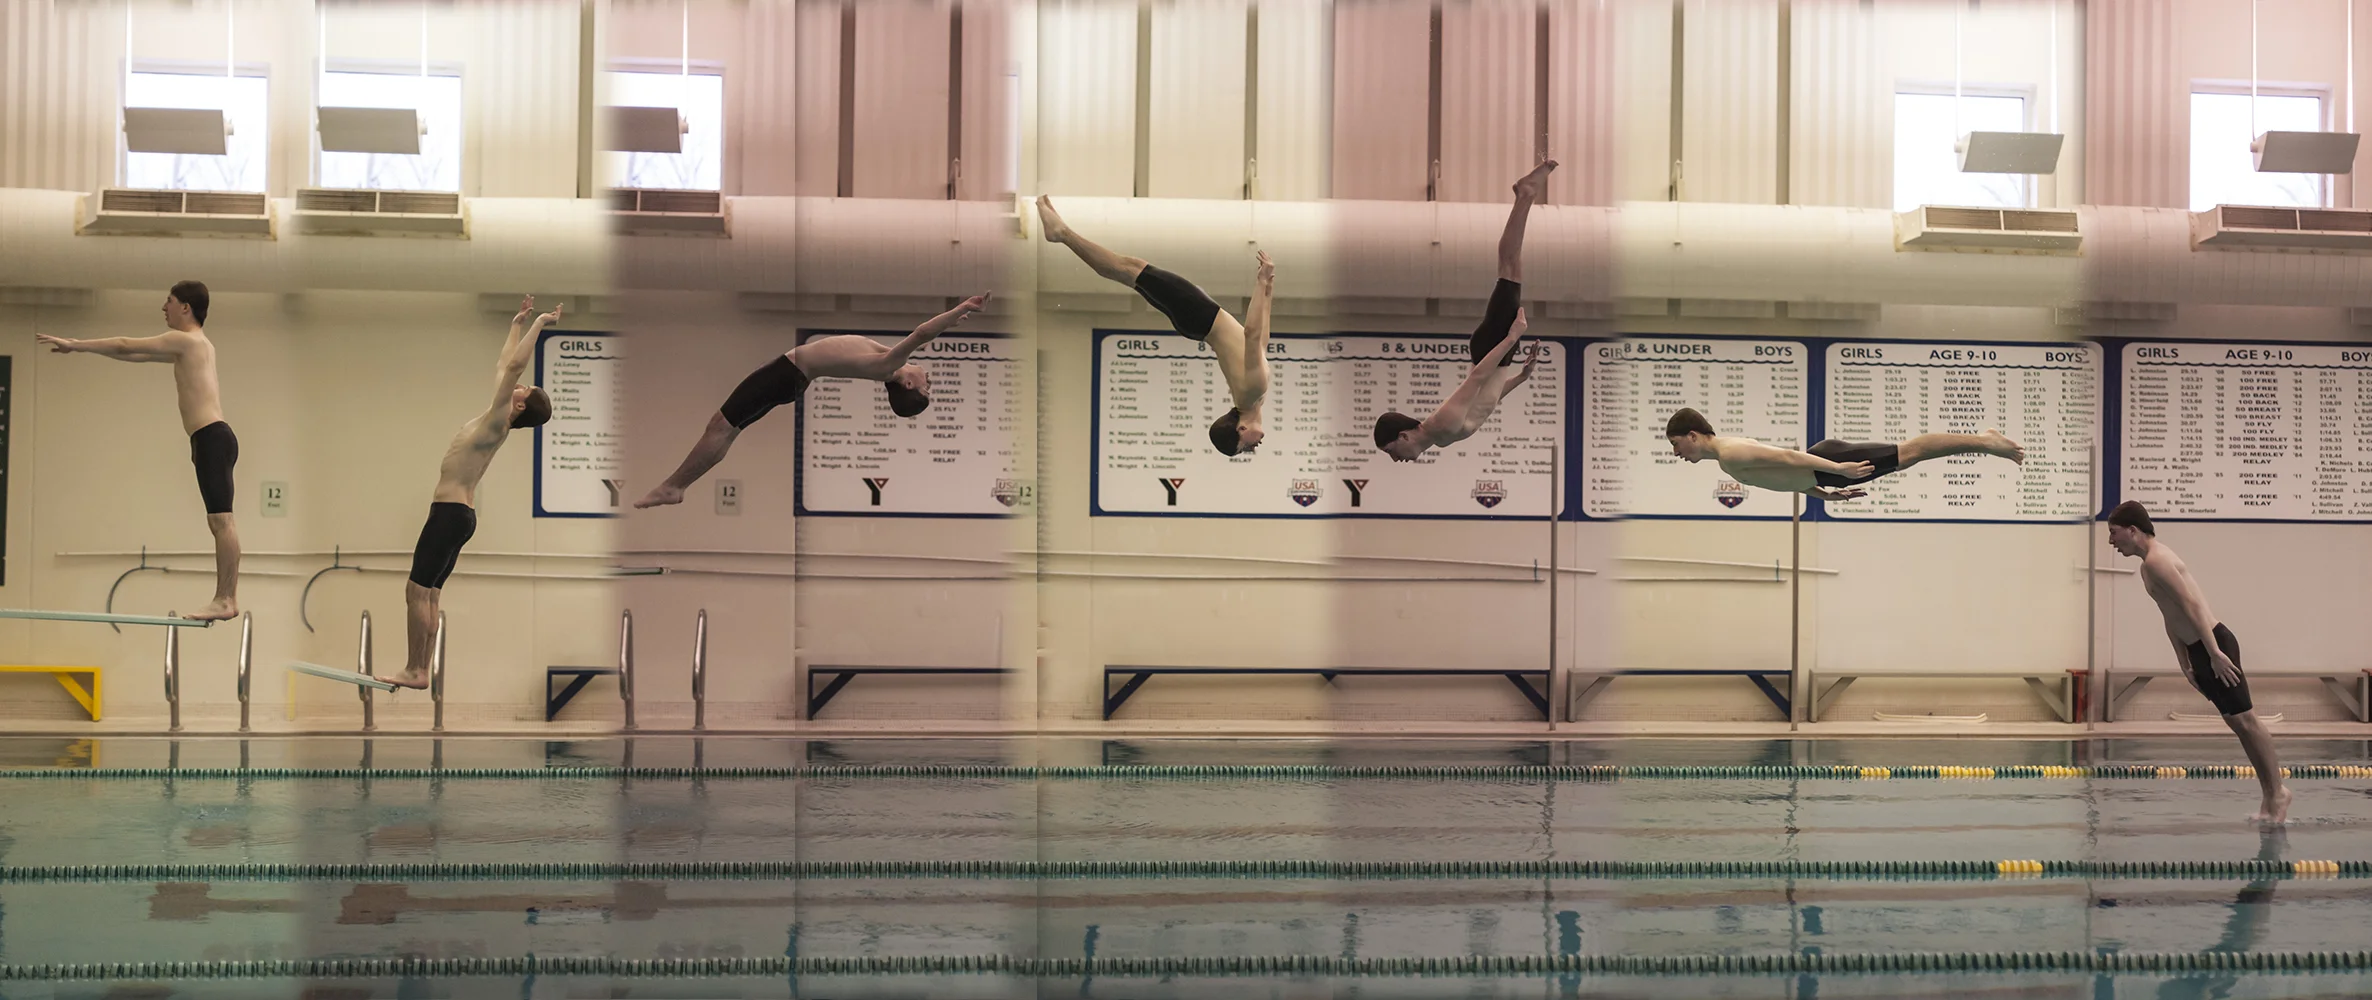
several frames, shown askew for detail
EDITING: Using Camera Raw/Lightroom or other processing software, fine tune your selected images. Locking exposure and focus while shooting will help ensure all images are starting at the same point, be sure to apply any additional adjustments identically before moving on to the next step. It is highly recommended to counteract any lens-created vignette or distortion.
LAYERING: In Photoshop (or similar) pull all images into your document as separate layers. In this case I put them in sequence bottom up, because of the choice to show each subsequent frame slightly above (towards the camera) the previous. Once layered, use auto align on all layers to be sure they are right where they need to be.
MASKING: Apply layer masks to all but the bottom layer and carefully paint out the surrounding areas to allow the lower layers to show through, pay particular attention to any point where your model overlaps from one frame to the next. In this case, I was able to mask out everything to the right of the diver in most frames, but the overlap was a challenge particularly where he shared the same space on 3 or more frames. The example below is more of a visual representation, as the mask itself is not visible, rather it is a pass-through for the layers below:

Use a softer brush on background masking, this will help make the seams between layers more seamless
FINISHING: Once your layering and blending is completed, apply any additional effect to the image as a whole. In this case, a bit of dodging a burning (in its own layer) and a black and white conversion.
THANKS FOR VISITING! I'd be interested in any similar projects you've done, post in the comments below.